
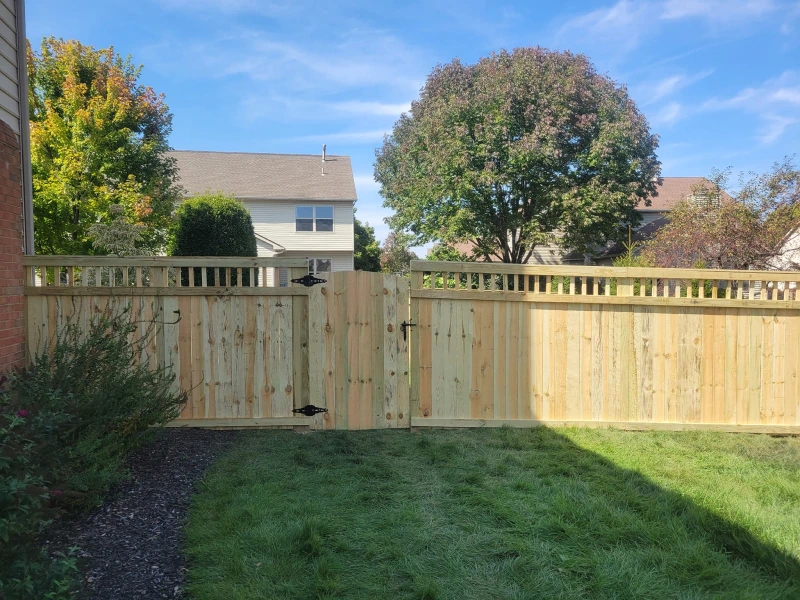
Why Proper Preparation Determines Fence Longevity
A wood fence represents a significant investment in your property’s curb appeal, privacy, and security. Yet many homeowners underestimate how critical the preparation phase is to achieving a finish that endures seasons of weather exposure. In Mount Vernon, OH, where winters bring freezing temperatures and salt exposure while summers deliver high humidity, the quality of your prep work directly impacts how long your stain will protect the wood beneath.
Skipping or rushing preparation steps leads to uneven stain absorption, premature peeling, and moisture infiltration that accelerates rot. Properly prepped wood accepts stain evenly, creating a barrier that shields against UV damage, water intrusion, and the expansion-contraction cycles that plague untreated fences. The difference between a fence that looks weathered after one season and one that maintains its beauty for years often comes down to the hours invested before the first brush stroke.
Professional outdoor living contractors understand that preparation accounts for approximately 70 percent of the project’s success. Whether you’re working with cedar, pine, or pressure-treated lumber common in fence installation throughout central Ohio, each wood type requires specific attention to grain patterns, moisture content, and surface condition before staining can begin. This initial phase sets the foundation for every step that follows.
Thorough Cleaning and Surface Inspection
Before any stain touches wood, the fence surface must be completely free of dirt, mildew, old finishes, and organic debris. Begin by clearing vegetation from the fence line and removing any loose material with a stiff brush. For fences that have been in place for a season or more, pressure washing proves essential to open the wood grain and eliminate accumulated grime. Use a fan tip nozzle positioned 12 to 18 inches from the surface, working with the grain to avoid splintering or damaging softer wood species.
In Mount Vernon’s humid climate, mildew growth on north-facing fence sections is common. A cleaning solution containing oxygen bleach effectively kills spores without the harsh effects of chlorine bleach, which can break down wood fibers. Apply the solution, allow it to work for 15 minutes, then rinse thoroughly. This step is particularly important for wood staining services, as mildew beneath stain will continue to spread and cause discoloration.
While cleaning, conduct a detailed inspection for structural issues. Check for:
Loose or missing fasteners that need replacement
Cracked or split boards requiring repair or replacement
Areas of rot or insect damage, especially near ground contact
Warped sections that may need realignment
Addressing these issues now prevents the frustration of discovering problems mid-project. Allow the fence to dry completely for at least 48 hours after washing, longer if weather conditions are humid. Wood moisture content should fall below 15 percent before staining; a moisture meter provides accurate readings and prevents costly mistakes.
Sanding and Repairing Surface Imperfections
Once the fence is clean and dry, sanding creates the smooth, receptive surface that stain requires for proper adhesion. This step removes raised grain caused by pressure washing, smooths rough spots, and feathers out any remaining old finish. For most residential fencing, 80-grit sandpaper strikes the right balance between aggressive material removal and surface smoothness. Work in the direction of the grain using even pressure, and avoid circular motions that create cross-grain scratches visible beneath stain.
Power sanders speed the process on large fence sections, but hand sanding remains necessary for posts, caps, and detailed trim work. Pay special attention to the top rails and post caps, where water tends to pool and cause the most weathering damage. These horizontal surfaces often show the greatest wear and require more thorough preparation than vertical boards.
Repair work should happen concurrently with sanding. Fill nail holes, small cracks, and gouges with exterior wood filler that accepts stain. Unlike the lighter fillers used for painted surfaces, stainable filler contains wood fibers that absorb pigment at a rate similar to surrounding wood, minimizing visual differences. Apply filler slightly proud of the surface, allow it to cure per manufacturer instructions, then sand flush.
For split boards or larger damage, consider whether repair or replacement makes more sense. Deck repair services often extend to fencing, and professionals can assess whether damaged sections compromise structural integrity. In cases where only a few boards need replacement, matching new wood to weathered lumber requires additional prep steps such as applying wood conditioner to equalize absorption rates. After all repairs and sanding, remove dust thoroughly with a tack cloth or leaf blower to ensure no particles interfere with stain application.
Selecting Stain and Mastering Application Technique
Stain selection involves balancing aesthetic preferences with protective performance. Oil-based stains penetrate deeply into wood fibers, offering superior water repellency and longer intervals between maintenance. Water-based stains dry faster, clean up easily, and produce fewer volatile organic compounds, making them preferable for applicators sensitive to fumes. Semi-transparent stains highlight natural wood grain while providing UV protection, whereas solid stains offer more complete coverage similar to paint but with better breathability.
For central Ohio’s climate, choose a stain formulated for temperature extremes and moisture exposure. Products containing mildewcides help prevent the fungal growth common in humid conditions. Test your chosen stain on an inconspicuous fence section or scrap board to verify color and coverage before committing to the entire project.
Application technique matters as much as product choice. Work in sections small enough to maintain a wet edge, preventing lap marks where dry and wet stain meet. Apply stain liberally with a brush, roller, or sprayer, then back-brush to ensure even penetration and eliminate drips. Brushing works best for detailed areas and vertical boards, allowing you to work stain into grain crevices. Sprayers cover large areas quickly but require careful masking and typically waste more product.
Weather conditions during application significantly affect results. Avoid staining in direct sunlight, which causes stain to dry too quickly and prevents proper absorption. Ideal conditions include temperatures between 50 and 85 degrees, low humidity, and no rain in the forecast for at least 24 hours. Early morning or late afternoon application often provides the best balance of workable temperatures and indirect light. Two thin coats outperform one heavy coat, allowing wood to absorb stain gradually without surface pooling that leads to uneven drying and sticky spots.
Ongoing Maintenance and Protection Strategies
A properly stained fence requires ongoing attention to maintain its protective barrier and visual appeal. Plan to inspect your fence twice annually, ideally in spring and fall, looking for signs of wear such as fading, water absorption, or film breakdown. The simple water bead test provides quick assessment: splash water on various fence sections and observe whether it beads and runs off or soaks into the wood. When water absorbs readily, the stain’s protective qualities have diminished and reapplication should be scheduled.
Routine maintenance extends the time between full refinishing projects. Keep vegetation trimmed back from fence surfaces to promote air circulation and prevent moisture retention. Clean the fence annually with a mild detergent solution to remove surface dirt and organic material before it becomes embedded. Address small areas of damage or wear immediately rather than waiting for widespread deterioration. Spot treatment of high-wear areas such as gates and post caps can add a year or more to the overall finish life.
Most quality stains require reapplication every three to five years depending on exposure conditions. South and west-facing sections that receive intense sun exposure typically need attention sooner than shaded areas. When the time comes for refinishing, the process becomes significantly easier because you have maintained the wood condition. Light cleaning and a fresh coat of stain can restore appearance without the extensive prep work required for severely weathered fencing.
For property owners who value their time or lack the equipment for large-scale projects, professional wood staining services offer efficiency and expertise. Experienced contractors complete preparation and application in a fraction of the time required for DIY efforts while ensuring even coverage and proper technique. When you consider the cost of renting pressure washers, sanders, and sprayers, plus the investment in quality stain and supplies, professional services often prove cost-effective. Whether you choose to tackle fence staining yourself or work with specialists in fence installation and maintenance, the commitment to proper preparation and quality materials will reward you with years of beauty and protection.